

Table of contents
In Git, the life cycle of a file refers to the various stages that a file goes through as it is managed and tracked within a Git repository.
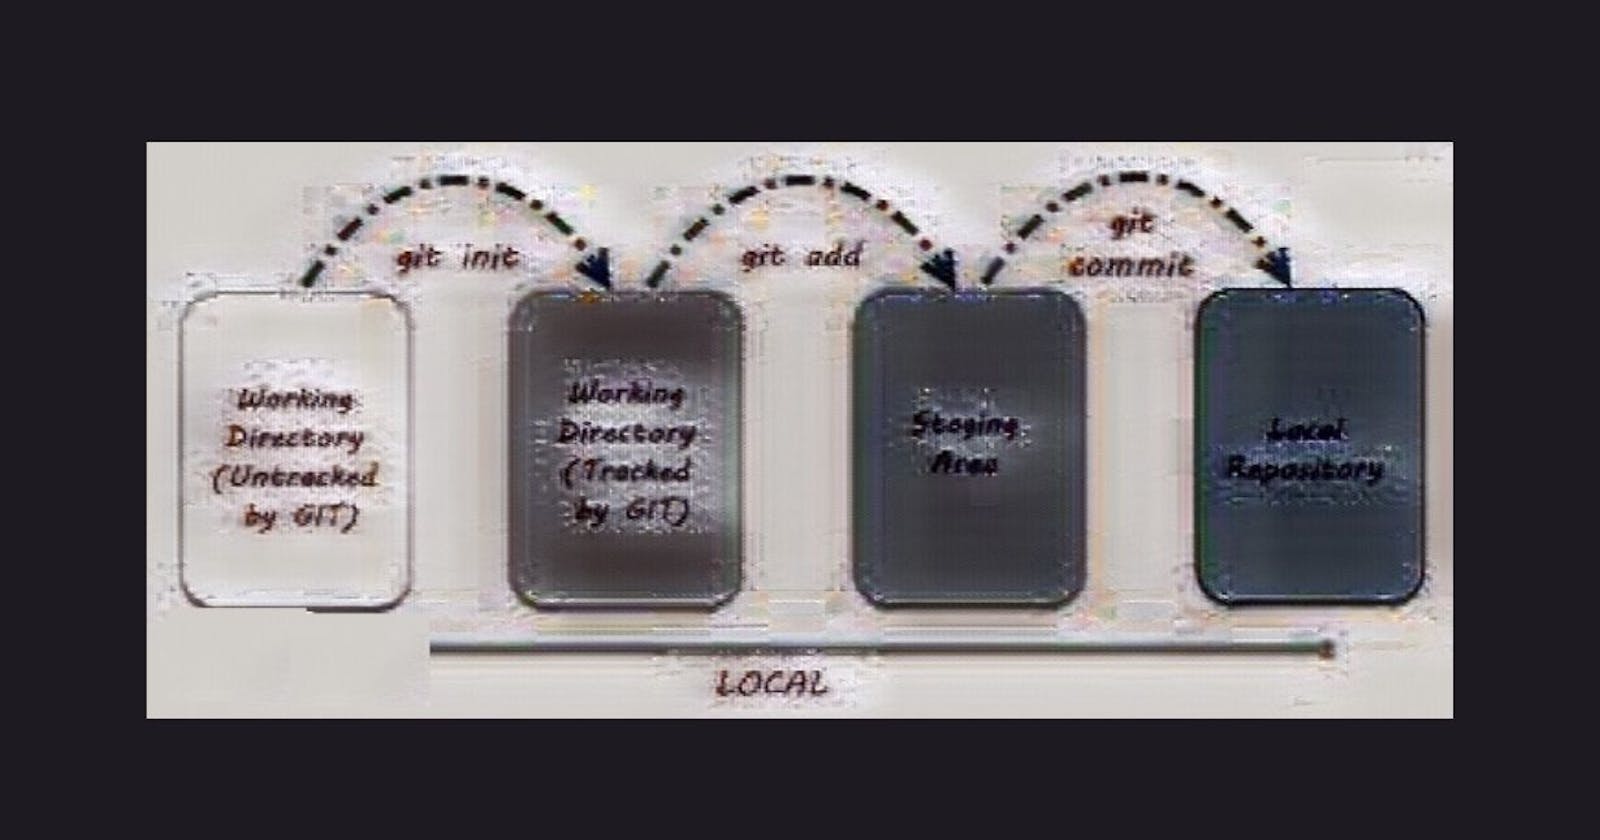
There are four primary stages in the life cycle of a file in Git:
Untracked
Staged
In Repository / Committed
Modified
So, every file in GIT will be present in one of the four states.
Untracked
In Git, an untracked file is a file that exists in your local working directory but is not currently being tracked by Git. This means that Git is not aware of the file's existence and the file will not be included in any commits until it is explicitly added to the repository.
If we want to create a new file, then it’ll be created in the Working Directory or let's say Every new file will be created in the Working Directory. If we create a new file in the working directory then by default GIT will not track the newly created file automatically. Such files are said to be in Untracked State.

You can check the status of your files in the local working directory using the git status command. If a file is listed as "untracked", it means that it has not been added to the repository and will not be included in the next commit.
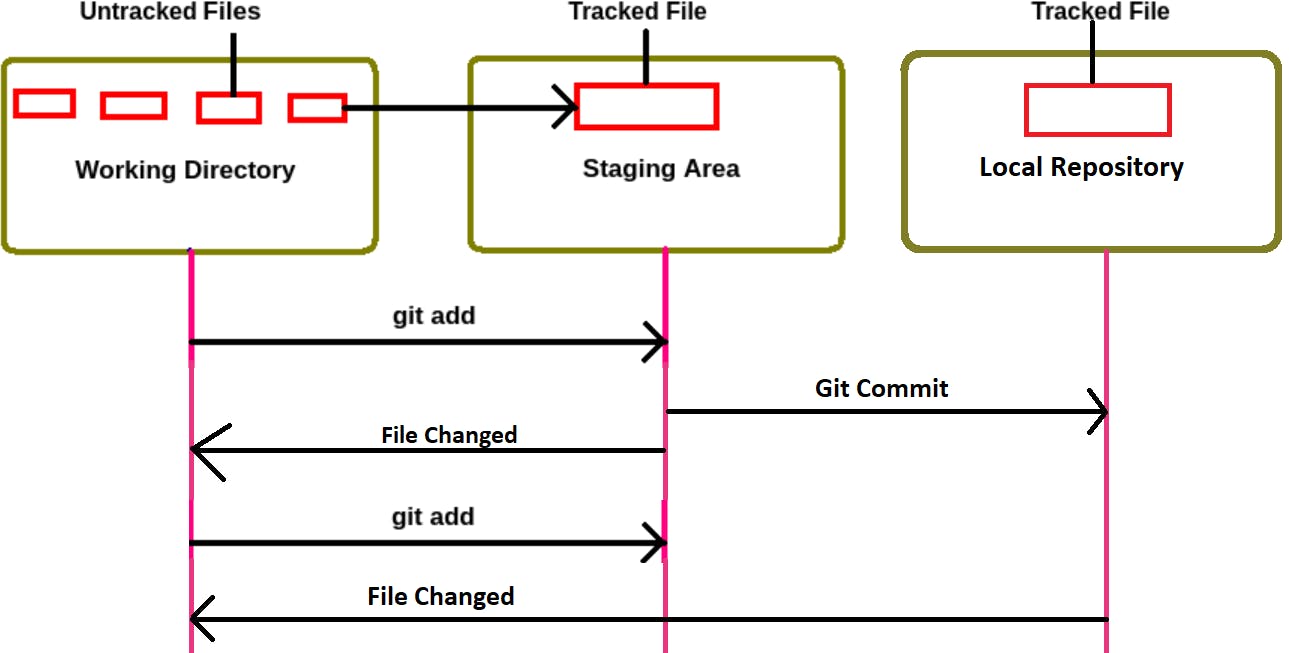
If We create a new file in the Working Directory and now want to commit that file to the Local Repository. Then, it won't commit directly.
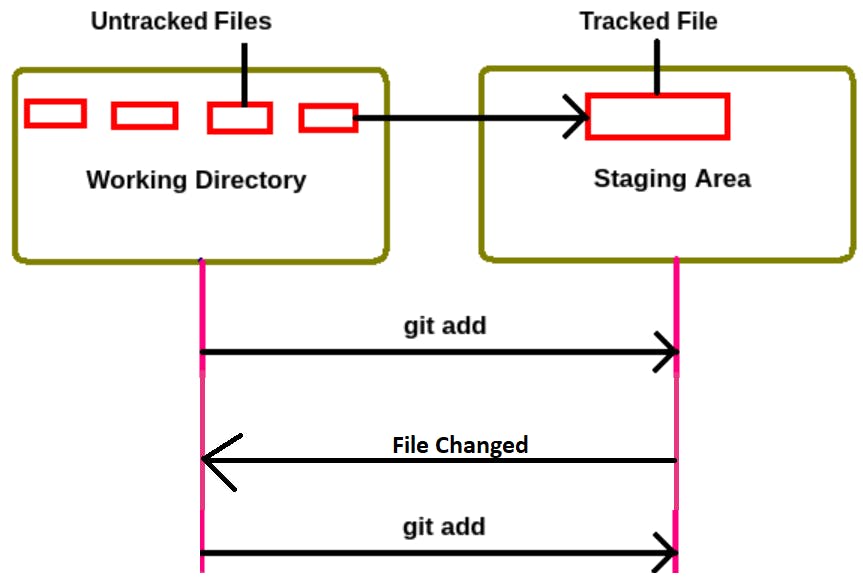
Before committing we have to add the newly created file to the Staging Area by using the command git add.
Git will only track files that we explicitly add to the repository. This means that if we create a new file in our local working directory but do not add it to the repository, Git will continue to consider it untracked, even if we make changes to the file later on.
If we no longer need an untracked file, we can simply delete it from our local working directory. Alternatively, if we want to remove a file from the repository and stop tracking changes to it, we can use the git rm command to remove the file and stop tracking it.
Staged
When a file is added to the staging area using the "git add" command, it becomes staged. The staging area is a temporary storage area where changes are stored before they are committed to the repository. Staging a file means that it is ready to be committed to the repository.
Once we add the file to the Staging Area, then only tracking will be started by the GIT.
Staging a file involves adding it to the "index", which is a snapshot of the current state of the local working directory. When we make changes to a file, we can stage those changes and then commit them to the repository.
To stage a file in Git, we can use the git add command followed by the name of the file we want to stage.
git add <name of the file>
For example, if we have made changes to a file named example.txt, we can stage the changes by running the command git add example.txt.
Once a file has been staged, it will be included in the next commit we make to the repository. We can use the git status command to check the status of our files in the local working directory.
If we make further changes to a staged file, the changes will not be automatically included in the next commit. We will need to stage the changes again using the git add command before they can be committed to the repository.
If we decide that we no longer want to include a file in the next commit, we can unstaged the file by using the git reset command followed by the name of the file.
git reset <Name of the File>
For example, if we want to unstage a file named example.txt, we can run the command git reset example.txt. This will remove the file from the index and it will no longer be staged for the next commit.
Now, we have to Commit the changes to the Local Repository.
Repository / Committed
When a file is committed using the "git commit" command, it becomes a part of the repository's history. The changes made to the file are stored in the repository, and the file is assigned a unique identifier called a commit hash. Once a file is committed, it can be reverted to any previous state in its history.
When you make changes to a file and commit those changes, Git creates a snapshot of the entire repository at that point in time, which includes the changes you made to the file.
To commit a file in Git, you need to first stage the changes using the git add command and then run the git commit command with a commit meaningful message that describes the changes we made.
git commit -m "Commit Message"
For example, if we have made changes to a file named example.txt and want to commit those changes, we can run the following commands:
git add example.txt
git commit -m "Update example.txt with new content"
For the multiple lines of message, we can put them by opening the editor ex: Vim, Nano etc.
We can’t commit whatever file that we want from the Staged area to the Local Repo. All the changes which are not there in the Local Repository will be committed.
Commits are permanent and cannot be undone. However, we can use the git revert command to create a new commit that undoes the changes made by a previous commit. This creates a new commit that effectively removes the changes from the previous commit without actually deleting it from the repository's history.
We'll discuss this later.
The data in the committed state must be required for the Versioning.
For every Commit GIT records multiple things:
Author Name
Mail ID
Timestamp
Commit message

Modified
When a committed file is changed, it becomes modified. The modified file is no longer the same as the committed version, and its changes can be staged and committed again to create a new version in the repository.
To return a modified file to its committed state, you need to stage the changes using the git add command and commit the changes again using the git commit command. When you commit changes to a file that has already been committed, Git creates a new snapshot of the repository that includes the changes you made since the last commit.
So, now if we check the status of the GIT then, GIT will immediately identify that whatever copy of the file present in the Local Repository is not the same as the file present in the Working Directory.
Modified: Any file which has been already tracked by GIT, but is modified in the Working Directory is said to be in Modified State.
Now, if we have to save that file to our Local Repository then we have to again add it to the Staging Area first using the command
git add <file name>
Then we have to commit that changed file from the Staging Area to the Local Repository using the command
git commit -m <"Commit message">
Now, there will be two versions i.e two Commits available in our Local Repository.
Example:
# Make changes to the file
$ nano example.txt

# Stage the changes
$ git add example.txt

# Commit the changes
$ git commit -m "Modify example.txt again"

# The file is now in its committed state again
The Untracked and the Modified files are available in the Working Directory.
Staged Files are available in the Staging Area.
Committed / Repository files are available in the Local Repository.
GIT will always object to the Modified files only as GIT will match the files in the Workspace and the files in the Local repository. So, the files which will not be the same i.e. the Modified files will be objected to by the GIT.
If the file has already been tracked by the GIT/present in the Staging Area then we can directly Commit the file into the Local Repository. We don’t need to do it separately as it’s a two-line process. But we can do it by using a single-line command git commit -a -m "commit message".
-a: Will add changes to the staging area. Then Commit with the Commit Message.